Monday, August 22, 2011

I am a finalist!

I received an email from Leah Day - that says my quilt made the finalist list!

Check out the 13 other great quilts who made the cut:

http://freemotionquilting.blogspot.com/2011/08/transformation-challenge-finalists.html

We will find out on September 30th who the 8 winners are.

Monday, August 1, 2011

Transformation Challenge Quilt - deadline is now past...

Sunday has now come and gone – so, did I get it done??? YES!!!!!!!!!!!! Woo, hoo!


I worked and went to church 23 hours this weekend, had to reprint the borders and label, then change the colors of the fabric (2 step process), and rush to JoAnns to buy a different color thread, as the one planned for the skin, basically disappeared on the fabric. Uggh!!

Last night Diana and Ramon took pics of the quilt, and we mailed it off – with 34 minutes to spare – plenty of time! Ha, ha.

Anyway, drum roll please………………… Here is my entry: “My Daughter”


Leah will notify the finalists on August 22nd – wish me luck!

Friday, July 29, 2011

Challenge update

Well, Sunday is the deadline to send Leah the pics of the completed quilt – so, “how is it coming?” you might ask. Well……….

My machine keeps jamming up on me (don’t know why, other than the deadline – it is clean, I have torn it apart a million times, new needle, bobbin is in right direction, tension is good).

Also I started, then got interrupted by life a few dozen times.

Then decided yesterday to start all over as I didn’t think it was good enough.

I am so glad that I did! I am really loving it (except when I want to kick the machine – but the QUILT – I am loving that!). So, yesterday I worked on it for about three hours.

When I planned this quilt, I made a sketch of how the stitches would look in each area, and what colors I wanted. It really helped me “see” the quilt.  Click on the pic to get a good closeup of the "stitching".

Here is what I had done before leaving for work today. I will work on it for maybe half an hour tonight (two jobs today, also getting up 2 hours early tomorrow to do grocery shopping before work, so can’t stay up too late). Then, I will have Saturday evening and Sunday afternoon to finish up.

As quick as this has gone so far (especially considering that I have to keep stopping to un-jam the machine) – I don’t think I will have too much trouble getting it done in time.

Without further delay – here is “My Daughter” – well, at least the beginning (please ignore all the loose threads not yet cut).

I want to go back and restitch the outlines of each area, and make it a little more smooth looking.

The hair is "Swirling Flames".  I want to outline each individual flame better.  But, I figure I need to get the whole quilt done first!

Please pray for me, that I get it all done in time. I told Dan that even if I didn’t get the quilt done in time for the contest, this has really been good for me, to push me beyond my capabilities, and besides, it is really fun!  Thanks, Leah!

You can see the original photo in my blog titled "Leah Day's Transformation Quilt Challenge" below.  Oh, by the way, don't notice that the pic is mirror image of the quilt.  I decided I like the back of the quilt better.  ;-)

Wednesday, May 25, 2011

Leah Day's Transformation Quilt Challenge

I have loved Leah Day’s site since I first discovered it, just a couple weeks into her project! Leah challenged herself to create a new filler quilting stitch each day for a year.


The designs she comes up with are amazing, and each day I dread how slow my computer is to pull up her site, as I am holding my breath to see the new design. When it is finally revealed (I have high speed, but boy! is that a long 3 seconds to pull up!), what little breath I still had, is completely taken away by the sheer genius and beauty of the new design.

As I read her weekly newsletters and shopped her quilt store, and read the daily blog, I felt like my knowledge of quilting had grown by leaps and bounds, and I thought of Leah as a friend.

When birthdays and Christmas rolled around, my hubby asked what I wanted, and the answer more than once was one of Leah’s books. My hubby had trouble getting one of the books downloaded so called and talked to Leah, and she was just as sweet and helpful over the phone, as she always appears on her blog, she even did something special to help him out. Thanks, Leah!

As I watched her new designs, and saw the new quilts she was creating, I could see a growth and change in her too. So, it was not terribly surprising that when she decided to have a quilting contest, that it would be called “Transformation”.

Because of my personal growth as a quilter, inspired by Leah, I had begun to play with a continuous line FMQ that was an entire scene. I thought of entering that as my contest piece, but it wasn’t anything transforming. It was just a beach scene on a hot summer day. But, it wasn’t transforming! So, “what to do??”

Well, this was a summer scene, maybe the transformation could be all the seasons in one quilt. I began to play with that, and thought of the background fabrics and colors of thread, and really enjoyed the plan. But, soon I realized it was too complicated for such a small quilt, and I wasn’t inspired to create some of the seasons, they came out pretty boring, without a lot more thought and work than I felt I had to spare before the contest deadline – so, again, “what to do??”

As I was mulling (and rejecting) ideas, my screen saver popped on, and up came the faces of my family. Seeing my beautiful grandchildren, I thought how they had changed from even just a year or two ago – a dim light was beginning in the back of my mind, but not enough to even call it a flicker yet. As I watched the different pics float over my screen, lost in memories of each child, another pic came up – my daughter, Diana. POW!!! – the light was now blinding!

What better example of transformation could there be than my daughter? As a baby she was adorably cute, but now she is awesomely beautiful. She began life as a daughter, and now she is a mother. She had been shy, but now put her behind a camera, and she is confident. She was an unskilled employee when she got her first job, and now she owns a business and employs others to help her! Of course, there are many consistencies in her life, like her style and artistic flair, her love of beautiful unique things, her devotion to family and friends. But, these things too have grown in skill level and depth of passion – so that too is a transformation.

As I watched the pics continue to float across my screen, in seconds the pattern for the contest began to form itself. I think my best patterns, are not planned, but come to me in a flash, almost complete, then I have to figure out just how to accomplish the end result. That is how this contest piece came to me – almost complete. Now, I just had to figure out “what to do??”

The contest rules said you had to use at least 5 of Leah’s stitches, so if I did an appliqué, it would be hard to showcase the stitching and yet not bury the pic of Diana. So, my mind went back to the summer continuous line pattern I had played with. The entire quilt had been stitching to show the rolling waves, the palm tree, the flying gulls, the fluffy clouds – you could clearly see the beach and feel the heat of the sun, but it was all done with stitches! Why could I not do the same thing with the pic of my daughter?

I am very fortunate in that Diana and her husband, Ramon, are professional photographers (she owns Peters Photography.net). The pics they take are always awesome, even if they are just family “snapshots”. My top header is one of her pics - and those are her children!  Aren't they cute?

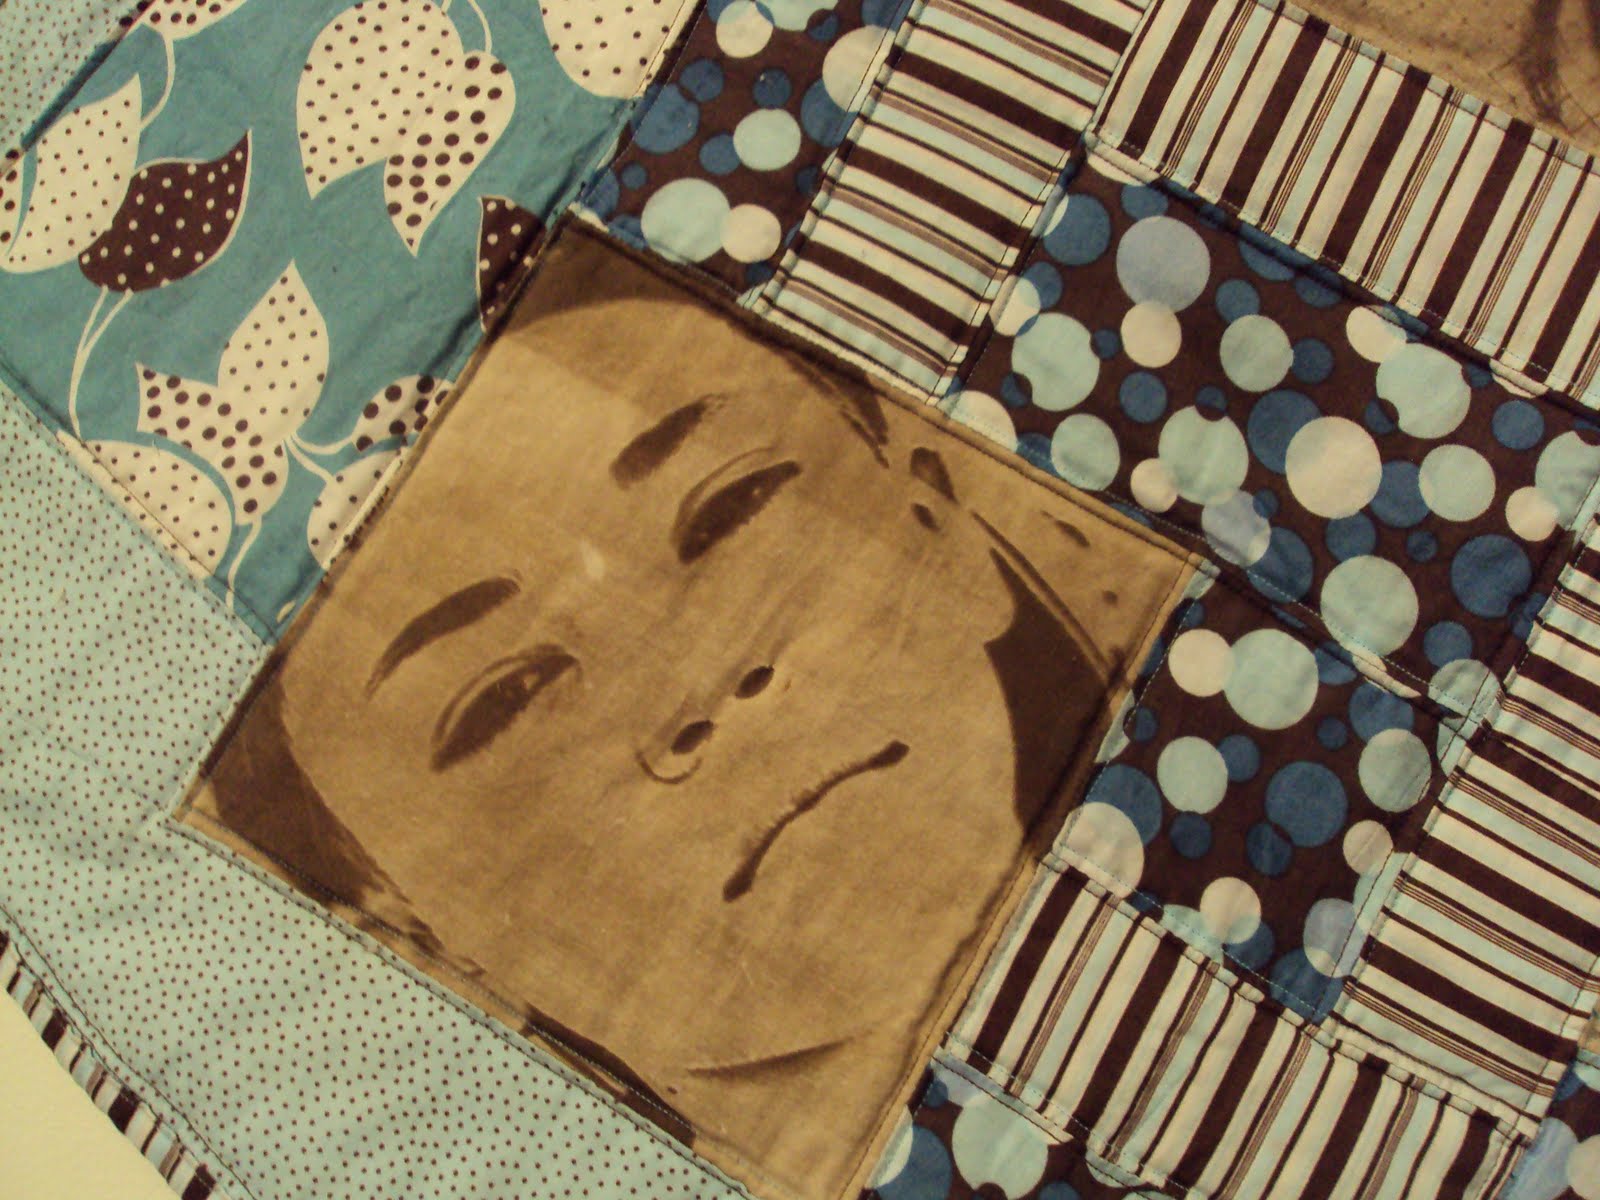
A couple years ago, they had gone on a second honeymoon while I watched the six kids for a week (yeah, I said SIX! - count them). Ramon took one pic, that seemed perfect for what I wanted – a close up of Diana’s face, her staring straight into the lens, her chin resting on her arm.

So, now that I had a pic chosen, I needed to decide what stitches to use. I began scanning Leah’s site (she has it set up so great, sorted by skill level, basic type, use and name). For the hair, I wanted lots of movement, but not something that looked tangly or Medusa-ish. And I wanted to suggest hair that had been kissed by the sun, a few highlights, and a few lowlights.

Leah has so many great designs it was hard to choose! As I would choose a design, I would see how it played out, and compare it to others for the same part of the pic. Since I was planning no appliqué (and no cyanotype printing, my favorite technique) for the pic, and planned to allow the stitches to form the pic, in a whole cloth style, I needed stitches which varied drastically from each other to set up the edges of each part of the pic.

Eventually I ended up choosing all 5 stitches from among the first few designs Leah made. Not that the other later designs are not equally fantastic, but these just seemed to fit!

So, Diana’s hair would be Swirling Flames. It would make the hair look smooth, but wavy. I decided if I could find it, I would use a variegated brown thread so the highlights and lowlights would not be stark, but blend into the hair as a total piece, giving life to her locks.

Her sleeve would be made of Matrix, it looked like a perfect “weave” for the fabric of her blouse. The thread color would match the blue of her eyes.

The background stitching had to be something not curvy since it would surround her hair. I liked the look of Etch N Sketch, because of all the straight lines, that varied in lengths, as it would easily shape around her head. If I did this in a green, it wouldn’t match any other area and would help define the background.

I knew that I only had one area left to quilt – the face – but that was only 4 stitches, so, once more, what to do?? I decided since I cannot embroider, have lousy hand writing and no other way than my favorite technique:cyanotype, to print the words I wanted on the quilt, that describes Diana’s Transformation, I would do a border around the pic to squeeze in one more design and find a home for the words. So, not 100% whole cloth, but pretty close.

This 5th stitch needed to be something round as the background and sleeve both had straight lines, and that is what would be next to the border. Finally I decided on Basic Spiral as the swirls reminded me of the winds of Autumn, kicking up a pile of multi colored leaves and bringing in the change of season, and hinting at the blistering winter storms to come. Or maybe it was more the way the magic wand was waved to change Cinderella’s pumpkin into a sparkling beautiful coach fit for a humble little girl who had been transformed into a princess, on her way to meet Prince Charming. Either way, I was happy with Basic Spiral as the border stitch.

Now, the hard part – her face. What do you think my first thought was? Of course, it was “what to do??” LOL

I wanted something which would make her face have shape, and would show the contours of her cheeks. I would need something that would be smooth looking. Striated Earth seemed perfect!

I planned to make her face in a pale beige thread, and with the same brown used for the hair, to give her brows and lashes. A darker beige to outline her nose. A couple of shades of pink for her lips, and of course a baby blue for her watery depths of eyes.

I sketched out the entire quilt, using colored pencils for the thread lines. I played with the size of the stitches, trying to get consistent spacing, and small enough to create the pic, but large enough I wouldn’t get frustrated (remember, I am still fairly new to the “quilting” process). Finally I had a plan that worked! I could hang the paper sketch pattern on my drawing board, walk across the room, and see just her beautiful face, and not the stitching. But, when I walked closer, I could see her clear blue eyes, the slight tip of the corners of her mouth, the waves in her hair. I could see the edges of each section of the pic, the background, the border, the sleeve, the hair, the face. The “stitching” was small, but not annoyingly so, and even – I think I can do this!

The next issue was what fabric to use – or in other words “what to do??” I decided muslin would have little balls of threads that could cause my stitching to wander, and then the whites of her eyes would not be white! Plain white cotton was a possibility, but seemed so, well, plain. Finally, I found a fat quarter with a slight texture, it wasn’t florally, or too pronounced – that would work!

I finished up a few projects (see another blog – when I get time to write it – about the 4 graduation quilts). And finally I am ready to start! Wish me luck!

Wednesday, July 14, 2010

Check out this drawing at Connecting Threads!

It would be great if I won this, since my birthday is the day after the drawing entry deadline, but if not, it is still great to read about this author and her exciting ideas!  Bop on over:

Connecting Threads interview with Anita Grossman-Solomon and a drawing!

Projects planned for cyanotype class

     I have been asked to teach a class on Cyanotype printing, and have tried to decide what to do! Did they just want to learn the process, or do they want a finished project? We are still planning, but I thought I would record my ideas.

     If we just learn the process, the class members can send me photos ahead of time, and I can make the films. We could then expose some fabrics and learn the Sepia Tones process. They could then use these fabric squares in any project they chose to do on their own after class.

     However, if they want a finished project – I need to come up with something. I had 2 ideas.

     First, we could print a design that would be a finished panel, that could then be cut out and completed after class.
     Thinking along the lines of the Butterfly Prayers (did you read the story about why I made the quilt?), I thought of a new item that could be used in class. What brings comfort to people who are hurting, physically or emotionally? A hug, a teddy bear, a note from a friend. Well, combine all that and you have a beautiful teddy bear, with hand written notes from friends, that they can hug when they hurt, whether they are alone or among a crowd of well wishers. Something they can cry into to, or fall asleep with. Something they can leave close at hand, for whenever they need a little comfort.
     If we just printed a teddy bear shape, that would be pretty boring. And if we had hand written prayers made into film, that would be pretty time consuming and costly, and limiting to the one bear. What we needed was something that could be used over and over again.
     So, I designed a teddy bear, that is pretty even without hand written prayers, but can be personalized easily, quickly and inexpensively as the occasion arises. The panel is designed so that it may be embellished and personalized.

     Second, since my quilt, Decade of Love, was the cause for asking me to teach the class, maybe I should design a quilt using the cyanotype process.
     Wanting to keep the costs low for the class, that would mean not buying a lot of the cyanotype fabric. But, how can you make a quilt, without a lot of fabric?
     Well, you could do as I did on the Decade of Love, use the cyanotype as only a portion of the total fabric. That would limit the cost but allow the cyanotype prints to shine in the pattern, as well as teach the process.
    I had a project bubbling in the back of my mind, for my nephew who will be leaving for Bible College this fall. I wanted to make him a quilt to let him know I am praying for him, with the same “feel” as Butterfly Prayers, but of course, I cannot give him butterflies! He is a guy! And the films for the Butterfly Prayers quilt are specific to the person it was made for, and I would have to get everyone in church to sign again (it took me about 2 months before, everyone wanted to think about what they wrote, because the lady is so precious to us all). That would not work! Besides, what if I want to do another quilt? My second nephew will go to Bible College next year. I needed something that was more generic, but with the same love and attention of Butterfly Prayers.
     So, I decided to design a quilt pattern with Cyanotype printing and use precut fabrics to add simplicity in assemblage and give it a scrappy look! Cool!
     The cyanotype fabrics would be only a small portion of the total fabric, so the cost is again limited.
     Instead of specific hand written prayers, this time I would use sketches to show we are praying for him. That way it would not be too “girly” and would be a generic that could be used for others as well.
     The company that I buy my fabric from has come out with colors (when I began doing cyanotype, the only option was white fabric that was chemically treated for the exposure). For my nephew I wanted the original blue (his favorite color) but the class may want to make a quilt for a girl – maybe the pink or orange would be nice!
     So, the quilt pattern was adapted to be for either gender, and could be made in a couple different sizes (my nephew is tall, and would need a few extra inches to cover him, more than the girls at church who are headed off to Bible College, they are really petite).
    
     I will be in the process of sewing one up soon, I am awaiting the cyanotype fabrics, and need to finish working on the sketches to be printed.

     Now, I was ready! I had two projects to offer the class! And the fact that I managed to get a personal project designed at the same time was truly a blessing from the Lord!

Wednesday, July 7, 2010

A closeup of 2 of my quilts at the Employee Quilt Show - Cyanotypes!

At the UNL Employee Quilt Show I had 3 quilts. One I talked about a little last time, and that was Ethan’s Diploma.

The other 2 were quilts I had made using a Cyanotype processing to print the fabrics.

I want to explain a little about the quilts first, and why they were made, so will reprint the story that hung beside them at the Employee Quilt Show.

First is Butterfly Prayers, a quilt made for a dear, dear friend.
Style Pieced cyanotype prints & cottons
Pattern Self designed
Credits Thanks to every member of Fellowship Baptist Church for writing out their prayers for this dear lady.
Size 41" X 41"

Butterfly Prayers was created for a woman I consider one of my closest friends and adopted mother. She is a widowed Pastor’s wife, a faithful servant of the Lord whose aged body is now limiting not only the service she desires to perform, but her very abilities to function in her home from day to day. Some days her body limits her ability to leave her bed, yet her spirit soars across the miles each time church services meet, and we feel her presence while missing her smiling face.

When considering making her this quilt, I wanted to remind her it was not only ME praying for her, but the entire church family. They all willing and lovingly wrote out their prayers for this dear lady who has been a testimony and blessing to us all. From the Pastor, Officers and Teachers, down to a 3 year old child who only put one hump on the M of her name, but daily, without prompting, she remembers to pray - they all wanted to be involved and show their love for this sweet, dear lady. I photographed my granddaughter Lily praying and imposed that pic onto 2 of the butterflies.

Once everyone had written out their prayers, I cut them into the shape of butterfly wings and had negative "films" made. Then the butterflies were scattered over a specially treated fabric and exposed to the sun to create the print. The quilting was done using flowers and butterflies as the stitching.

I think this is the favorite quilt that I have ever made.
This is my granddaughter, Lily, praying.See the 3 year old's signature with the one hump on her M?  That is my grandaughter, Emelia.

See how I reshaped the written prayers to fit the wings?

This poem explained my thought processes in making the quilt.  I had written this poem for my first version of the quilt (not a cyanotype), which was made for another dear friend.


The second quilt I made using the Cyanotype process is Decade of Love.
Style Pieced cottons
Pattern Inspired by Maple Islands BQ
Credits My daughter, Diana of Peters Photography, took the photos of the children. Machine quilting by Trudy Rhoads.
Size 42"W X 40"H

Decade of Love is a celebration of my daughter and her husband’s life together. While there have been many milestones in their lives – the quilt shows six special highlights – their children, who are the most blessed events in their married life. The children are the events which will touch and possibly change the world around us – as they have touched and changed me and mine. They are the events we will remember the longest, with the most emotion.

The quilt was created to tell my daughter and my son (I don’t think of him as my in-law, just as my son) how much I love the two of them, and thank the Lord daily for the help they are to me and my husband, and how we consider them our very best friends. Also, to praise them for how they are raising our grandchildren, to be responsible and caring persons.
Jaysen was 9 at the time the pic was taken,

Avianna was 8,
Isabel was 7, and is wearing MY grandmother's pill box hat with dotted netting over her face,
Lillian was 5,
Emelia was 3,
and Damon was 2.

Their beautiful faces made it a really hard decision how to quilt it – I didn’t want thread all over their faces (peanut butter and jelly or pizza sauce is more the norm!). I decided on a simple stitch along all the seams.

I will blog more later about plans I have for a Cyanotype class I will be teaching, and the patterns I have designed for the class.